
Coffee Brewing Guide

Good coffee doesn't need complicated equipment — it needs a bit of consistency and the right approach for your beans. These three methods cover different styles and skill levels, but all of them can produce an outstanding cup at home.
AeroPress
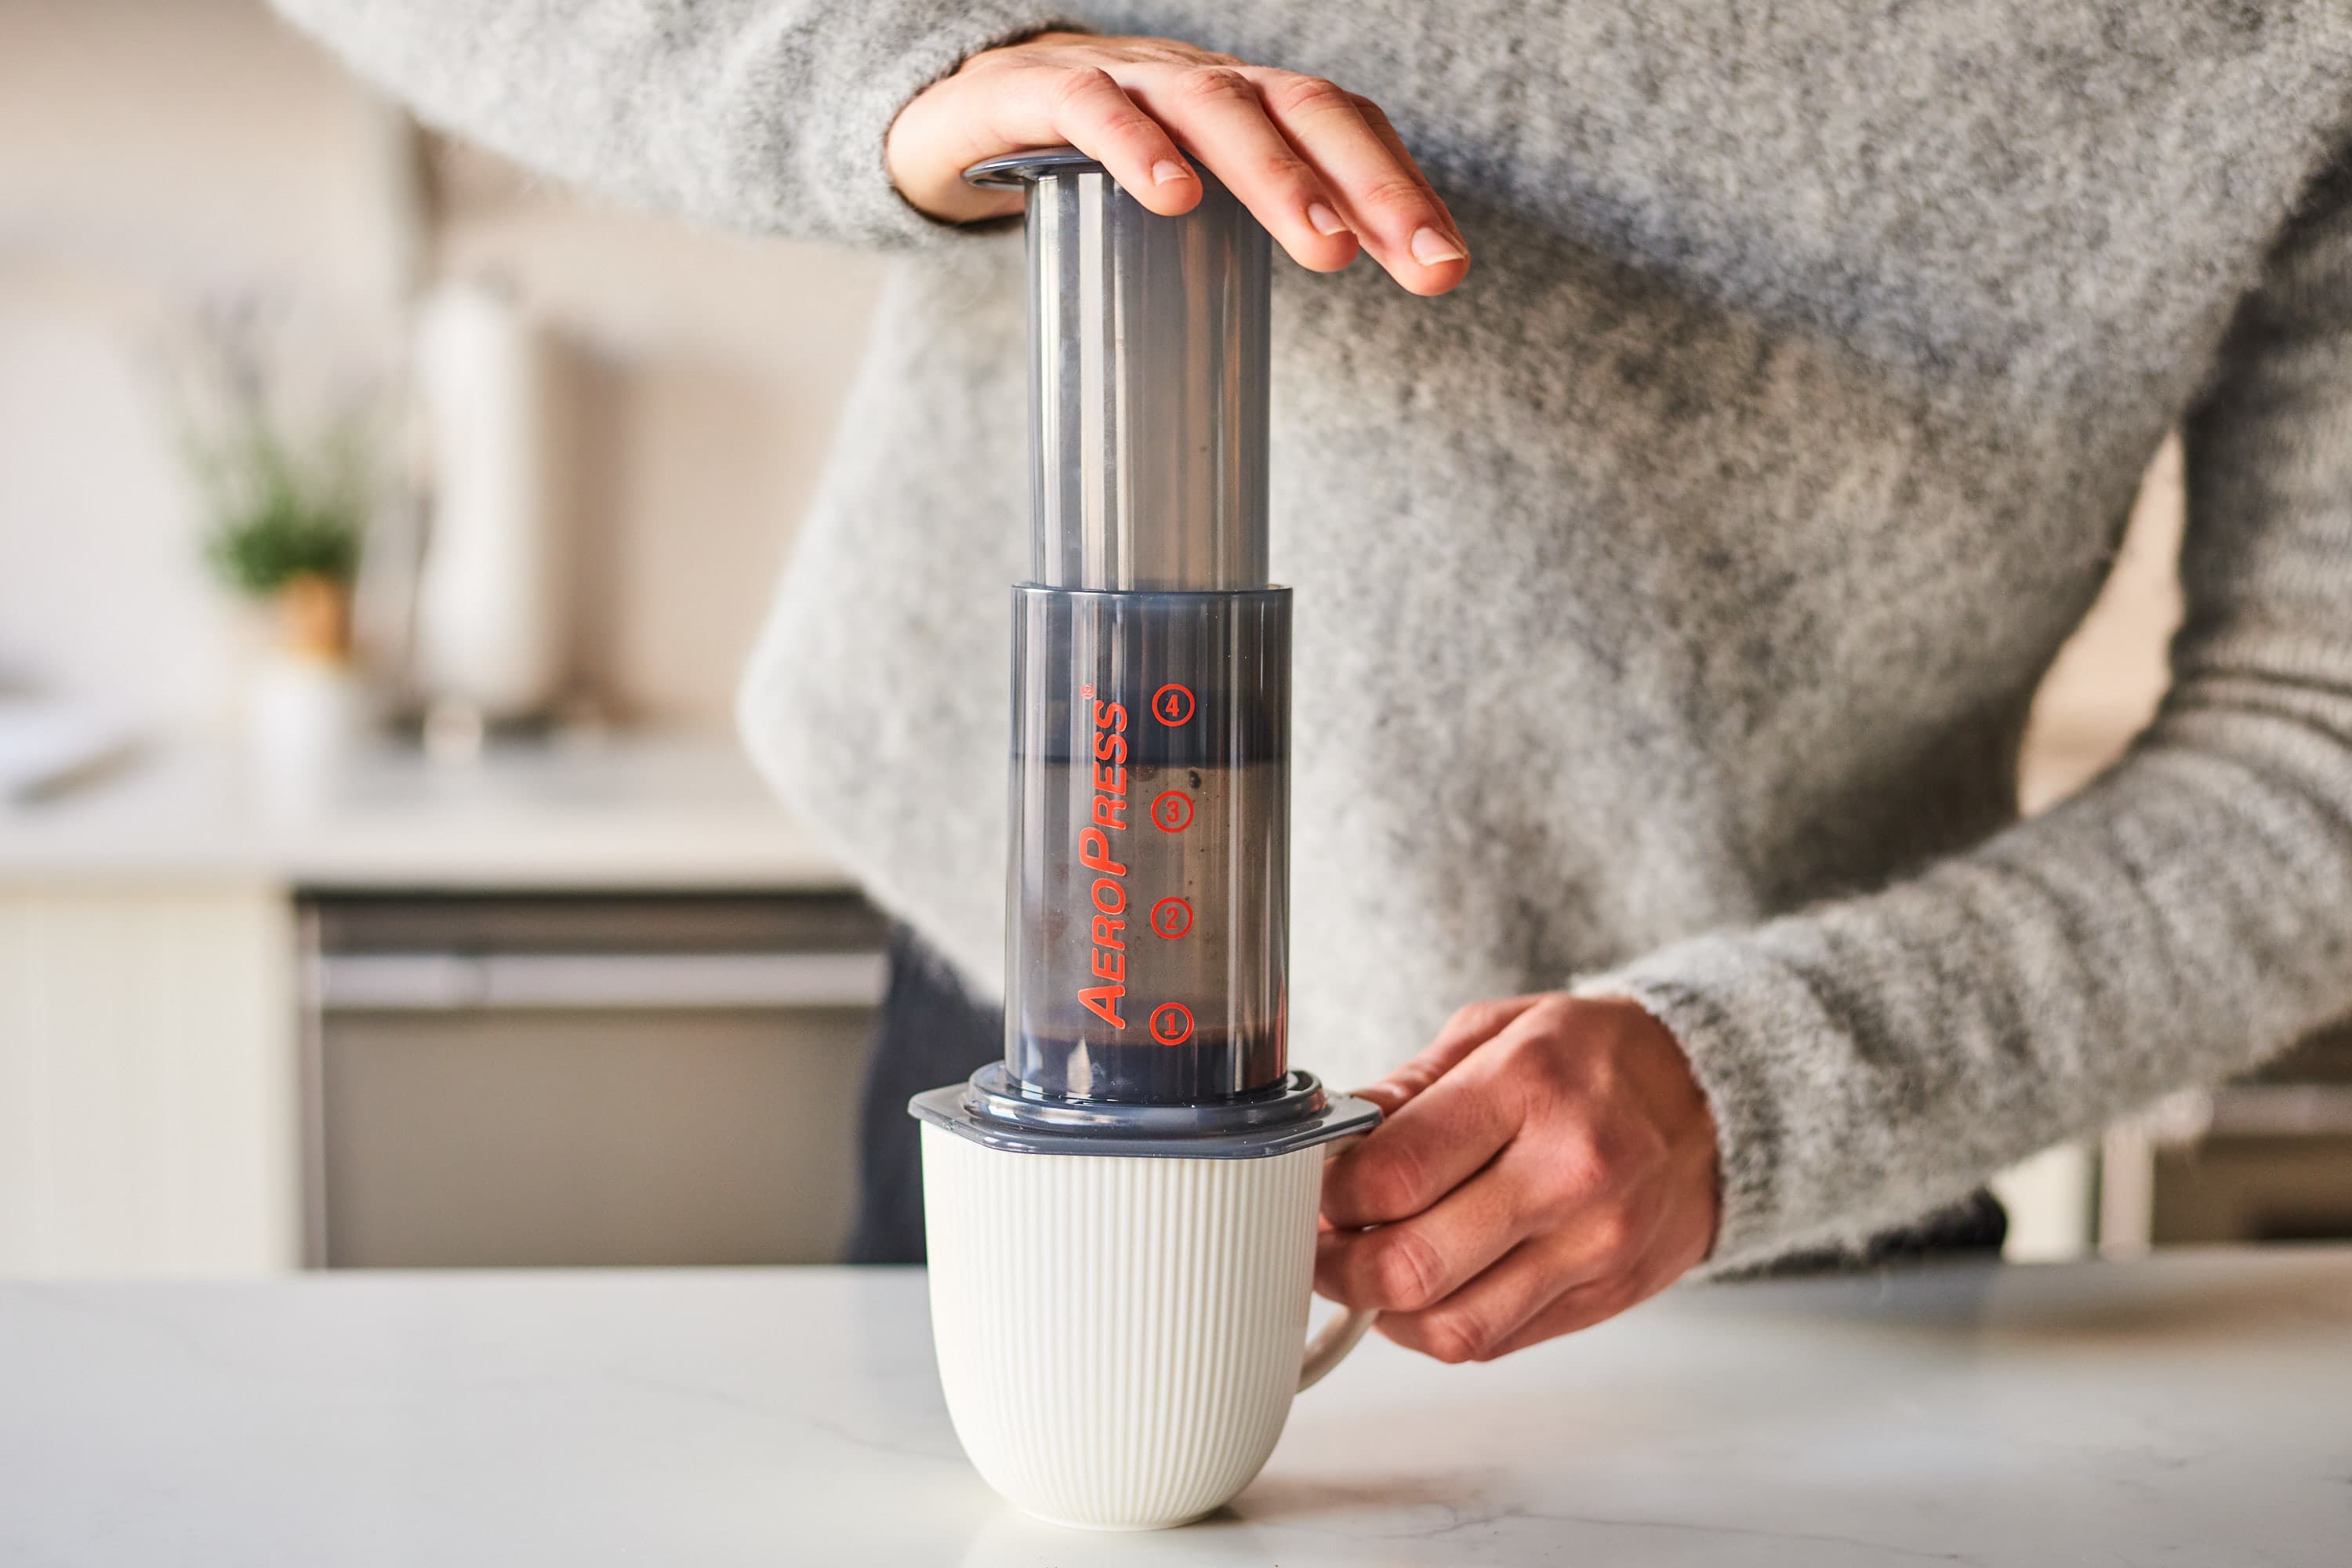
The AeroPress produces a concentrated, full-flavoured brew somewhere between espresso and filter — rich body, low acidity, minimal bitterness. It's quick, portable, and almost impossible to get badly wrong, which makes it the best starting point for anyone new to manual brewing. It also rewards experimentation if you want to push further. Our Signature Blend is tailor-made for it — the balance holds beautifully under pressure
What you need
- AeroPress with paper or metal filter
- 17 g of freshly ground coffee (medium-fine grind — finer than filter, coarser than espresso)
- 250 ml of water, just off the boil (90–94 °C)
- Kitchen scales
- Timer
- Mug or server
Instructions
- Place a paper filter in the AeroPress cap and rinse with hot water to remove any papery taste. Discard the rinse water.
- Assemble the AeroPress in the standard (non-inverted) position on top of your mug. Add 17 g of ground coffee.
- Start your timer. Pour 250 ml of hot water steadily over the grounds, filling to just below the top. Give the slurry a quick stir to ensure even saturation.
- Attach the cap (with filter inside) and wait — let it steep for 1 minute 30 seconds total.
- At 1:30, begin pressing the plunger down slowly and steadily. Aim for about 30 seconds of gentle pressure. Stop just before you hear hissing — that's air, not coffee.
- Serve immediately as is, or dilute with a splash of hot water if you prefer a longer cup.
Helpful guide from an independent creator — not affiliated with Strangford Coffee.
Clever Dripper

The Clever Dripper is a hybrid brewer — it steeps like a French press but drains through a paper filter, giving you the sweetness and clarity of filter coffee without the sediment. The hands-off steep time makes it a forgiving, repeatable method that suits early mornings or batch brewing for two. It's particularly good with sweeter, nutty or chocolatey coffees. Our Brazil Santa Maria shines here, with its natural sweetness and smooth finish. The Guatemalan brings a little more body and a pleasant caramel edge that the steep time draws out well.
What you need
- Clever Dripper with paper filter (size 4)
- 22 g of freshly ground coffee (medium grind — similar to coarse table salt)
- 340 ml of water at 93–96 °C
- Kitchen scales
- Timer
- Server or mug
Instructions
- Place a size 4 paper filter in the Clever Dripper and rinse thoroughly with hot water. Discard the rinse water.
- Add 22 g of ground coffee to the rinsed filter. Set your Clever Dripper on your scales and tare to zero.
- Start your timer. Pour all 340 ml of water over the grounds in one steady pour, ensuring all the coffee is saturated. Give it a gentle stir.
- Place the lid on and let it steep for 3 minutes 30 seconds. The Clever's valve stays closed while it sits on a flat surface — don't place it on the server yet.
- At 3:30, set the Clever Dripper on top of your server or mug. The valve opens automatically and the brew begins to drain through.
- Allow to drain fully — usually another 1–1.5 minutes. Total brew time should sit around 4.5–5 minutes.
Helpful guide from an independent creator — not affiliated with Strangford Coffee.
V60 Pour Over
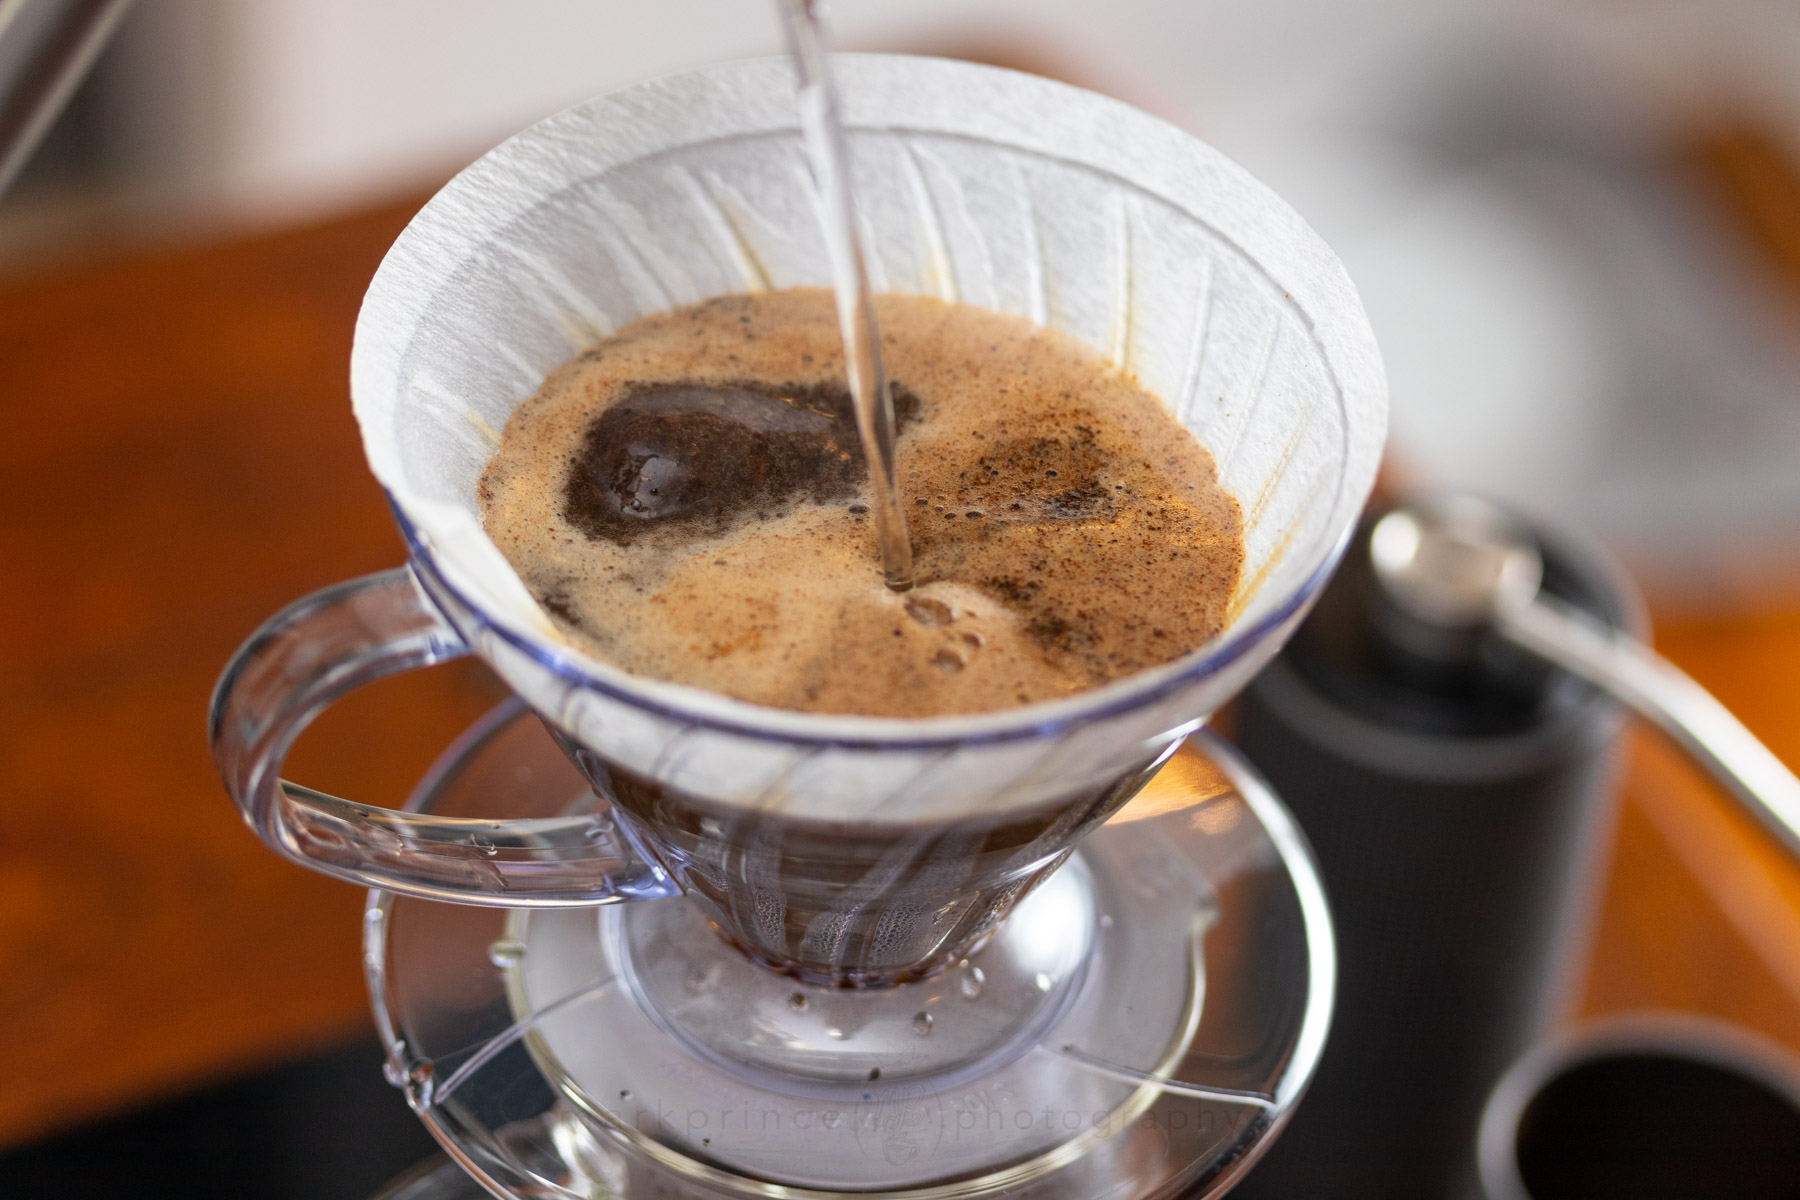
The V60 is a precision tool. Get it right and it produces some of the cleanest, most expressive filter coffee you'll taste — every floral, fruity and delicate note in the bean gets a chance to come through. It takes a little more attention than the other methods here, but the reward is a cup that genuinely tastes like the origin. It's the natural home for our more complex single origins. The Ethiopia Yirgacheffe is stunning through a V60 — bright, jasmine-like, almost tea-like in its clarity. The Colombia Gallego Microlot offers stone fruit and sweetness that the slow pour coaxes out beautifully.
What you need
- Hario V60 dripper (size 02) with paper filter
- 15 g of freshly ground coffee (medium-fine grind)
- 250 ml of water at 92–94 °C, plus extra for rinsing
- Kitchen scales
- Timer
- Gooseneck kettle (strongly recommended for pour control)
- Server or mug
Instructions
- Place a paper filter in the V60 and set it on your server. Rinse the filter thoroughly with hot water to seal it to the cone and preheat the server. Discard the rinse water.
- Add 15 g of ground coffee to the rinsed filter. Gently shake the dripper to level the bed.
- Start your timer. Begin with the bloom: pour 30–35 ml of water (about twice the coffee weight) slowly over the grounds, ensuring everything is wet. Let it bloom for 30–45 seconds. You'll see the coffee swell and degas — this is a sign of freshness.
- At 0:45, begin pouring in slow, steady spirals from the centre outward. Pour up to 150 ml total by 1:15.
- Continue pouring in two more stages, reaching 250 ml total by around 2:00. Keep the water level in the cone consistent — don't let the bed drain between pours.
- Allow the brew to drain fully. Total draw-down should complete between 2:45 and 3:30. If it's running long, go coarser next time. If it's over too quickly, go finer.
Helpful guide from an independent creator — not affiliated with Strangford Coffee.
French Press

The French Press is one of the most rewarding methods you can brew at home. It produces a full-bodied, immersive cup — the mesh filter lets the natural oils pass through, giving the coffee a richness and texture that paper-filtered methods can't match. Because of that depth, it suits darker roasts and blends particularly well. Our Signature Blend is an excellent place to start here — roasted by the same pair of hands and dialled in with this style of brewing in mind.
What you need
- French Press (any size)
- Coarsely ground coffee — 30g per 500ml
- Freshly boiled water, rested for 30 seconds (around 93°C)
- Timer
- Scales (recommended)
- Wooden spoon or long stirrer
How to brew
- Pre-heat your French Press with a splash of hot water, then discard it.
- Add 30g of coarsely ground coffee to the empty press.
- Pour in 500ml of water at 93°C, making sure all the grounds are saturated. Give it a gentle stir.
- Place the lid on top with the plunger pulled up. Start your timer.
- Steep for 4 minutes.
- Press the plunger down slowly and steadily — no need to force it.
- Pour immediately into your cup.
Helpful guide from an independent creator — not affiliated with Strangford Coffee.
Home Espresso (Bean-to-Cup & Semi-Auto)
:max_bytes(150000):strip_icc()/How-to-Make-Better-Espresso-Drinks-at-Home-FT-BLOG0625-02-9b5566c8584e4e9f97bd460d92cb4ab6.jpg)
Home espresso is the most variable of all brew methods — your machine, your grinder, and your coffee all interact, and small changes in any one of them shift the result in the cup. That said, the fundamentals are consistent across most machines, and once you have them dialled in, it's one of the most satisfying ways to drink coffee at home.
For espresso, we recommend our Signature Blend — developed to hold up well under pressure, with sweetness and body that translate beautifully in the cup. Single origins can work brilliantly as espresso too; if you're after something more adventurous, our Colombia Gallego Microlot is a standout — expect bright fruit and clarity where you might usually find only weight.
What you need
- Espresso machine (bean-to-cup or semi-automatic)
- A burr grinder — this matters more than the machine itself
- Freshly roasted beans
- Scales — optional but genuinely helpful for consistency
- Tamper (for semi-auto machines)
How to brew
- Dose 18–20g of coffee for a double shot. Use the same amount each time until you find what works for your machine.
- Grind fine — finer than filter, coarser than icing sugar. The puck should offer resistance but not choke the flow.
- Tamp evenly and firmly if using a semi-automatic machine.
- If your machine has a pre-infusion setting, use it — a few seconds of low-pressure saturation before full extraction improves evenness.
- Aim for an extraction time of 25–30 seconds from the moment water starts flowing.
- Target a yield of 36–40g of liquid espresso in the cup. Weigh it if you can.
Helpful guide from an independent creator — not affiliated with Strangford Coffee.
Milk drinks
Use fresh whole milk for the best texture. Stretch it to 60–65°C — warm enough to hold a velvety microfoam without scalding. You're aiming for a smooth, silky consistency, not stiff peaks. If your milk is foamy rather than glossy, try keeping the steam wand tip just below the surface and introducing less air.
Grind Size Reference
Grind size is the single biggest variable in home brewing. Get it wrong and even great coffee falls flat — too coarse and the cup is weak and watery, too fine and it turns harsh and astringent. A good burr grinder matters more than the brewing device you choose. Blade grinders chop rather than grind, producing a mix of fine dust and large chunks that extract at different rates and make consistency nearly impossible. If you're serious about what's in your cup, upgrading your grinder is the most impactful change you can make.
| Grind Size | Brew Method |
|---|---|
| Coarse | French Press |
| Medium-Coarse | Clever Dripper |
| Medium | Filter / Drip |
| Medium-Fine | V60 / AeroPress |
| Fine | Espresso / Moka Pot |
| Extra Fine | Turkish |
Storing Your Coffee
How you store your coffee between the roastery and the cup makes a real difference to what ends up in it. A few straightforward habits protect the work that went into the roast.
- Buy smaller, buy more often. Freshness matters more than bulk savings. Coffee is at its best in the weeks after roasting — a large bag that sits open for two months has already lost most of what made it worth buying.
- Store in an airtight container, away from light, heat and moisture. A cupboard away from the hob is ideal. The fridge and freezer are not — condensation is the enemy of ground coffee and whole beans alike, and every time a cold bag meets warm air, moisture gets in.
- Keep it as whole beans for as long as possible. Ground coffee goes stale significantly faster than whole beans. Grind just before you brew where you can — even a modest hand grinder makes a noticeable difference.
- Peak flavour window: for filter brewing, aim to use your coffee between 5 and 21 days after the roast date. For espresso, allow a few extra days at the start — freshly roasted beans contain CO₂ that needs to degas before extraction settles properly. 7–21 days post-roast is the sweet spot for espresso.
Water Makes More Difference Than You Think
Water is around 98% of what's in your cup, and most people never give it a second thought. The mineral content of your water directly affects how flavour compounds are extracted from the coffee — too little and the cup tastes flat and lifeless, too much and it can taste harsh or chalky. Filtered water makes a noticeable difference, particularly if you're in an area with hard tap water. The ideal total dissolved solids (TDS) sits between 75 and 150 ppm — most filtered water lands comfortably in this range. Avoid distilled water entirely; with no minerals present, extraction suffers and the cup lacks depth. Heavily softened water has its own problems, replacing calcium and magnesium with sodium in a way that dulls rather than enhances flavour. If a filter isn't an option, allowing your tap water to sit for a few minutes before boiling lets some of the chlorine dissipate, which can take an edge off the taste.
Not sure which to start with?
Start with the AeroPress. It's the most forgiving of the three — grind size, water temperature and timing all have a little flex in them, so you'll get a solid cup even while you're still dialling things in. Once you're comfortable with the basics, the Clever Dripper and V60 are natural next steps.
Whatever method you choose, the coffee matters most. Browse our full range and find something worth brewing properly.